
Saturday, December 10, 2011
Fa, La, La, La
The main image here is actually a sticker (this was a gift from my neice, I couldn't say no, she doesn't understand how one can be a stamp snob) I added some distress ink and other various paraphernalia to complete this.

Thursday, December 8, 2011
Flock a Sock
I used a very retro color combo with the Stitched Stocking set and punch. Then I added flocking to the sock to give it some fuzzy texture.


Tuesday, December 6, 2011
Peaceful Wishes
I paired this image with all of my other SU supplies to go with my favorite Christmas song which is Thistlehair the Christmas Bear by Alabama.


Monday, December 5, 2011
Warm and Fuzzy
I used some punch art to make my mittens, added some felt for the fuzzy, and the background is fabric adhered to c/s then embossed with the vintage wallpaper folder for the warmth.


Sunday, December 4, 2011
Kick off Christmas!
Over at Splitcoaststampers the SUO Creative Crew challenges for December have been posted and I thought I'd start with those for a "Kick off Christmas" theme!
My color combo was: Perfect Plum, Brushed Gold, Elegant Eggplant, V.Vanilla
CCREW1211DF, CreativeCrew, SUO or SUM -- DSP/Color Focus: Pick any one combo and make all of the challenges with that combo. Please share your color combo! To start off use the attached fun & funky sketch!

CCREW1211CF, CreativeCrew, SUO or SUM -- Catalog focus: One piece of Jewelry, Handbags, Wearable Art This could include something made from our fabric line, something with the Simply Adorned line, or something entirely unique to you! Just keep it in your color combo!

CCREW1211HF, CreativeCrew, SUO or SUM -- Holiday focus: A home decor item - can be holiday or everyday, as long as you keep to your color combo

CCREW1211SF, CreativeCrew, SUO or SUM -- Scrapbook focus: Not actually a scrapbook "focus" this month, more of a "free for all" item - you can do an SB page, framed art, giftable, treat packaging whatever! Rock my world with whatever "wow" you can think! But, keep to your color combo

Thursday, November 17, 2011
Time For Tea
Another Hope You Can Cling Too card, tea seems to be just the ticket when you're feeling punkie!


Tuesday, November 15, 2011
Soft and Yummy
I had fun with this one, the background is actually a piece of "velvet paper" that I've had forever! I love how it looks with that embossing folder!


Sunday, November 13, 2011
Not To Shabby
My challenge for Hope you can cling to was to make a collage card, this was make vintage, shabby sample


Friday, November 11, 2011
More Paint Chips
This fun paint chip has a textured feel to it so it really adds dimension to the card!


Wednesday, November 9, 2011
Inspired By Paint Chips
For this Hope You Can Cling To challenge I dug out some paint chips, I had forgotten what a cute touch they can add to a card


Monday, November 7, 2011
Save The Hooters
I was playing around with a friends Owl Punch (no I haven't bought it, yet) and came up with this cute play on words for the Hope You Can Cling To Challenges


Saturday, November 5, 2011
I Stamped This One
I actually made a window card, I haven't done one of these forever and I love the softness of this one. This is one that will be going to SCS Hope You Can Cling To Drive.


Thursday, November 3, 2011
Reminds Me of Gramma's House
Another DSP card, I love the Beau Chateau paper, this sheet reminds me of my Gramma's kitchen!


Tuesday, November 1, 2011
More Easy Peasy
Another sweet card made mainly with DSP, this one is Berry Blossoms, that Coral is really growing on me!


Monday, October 31, 2011
Christmas Take Two
There's no stamping here, just the new Frostwood Lodge DSP and glass glitter, it's kind of a little to easy!


Christmas Take One
Doesn't this embedding embossing technique look way cool on the glimmer paper I LOVE it!


Wednesday, September 28, 2011

Tuesday, September 27, 2011
I Love Tag Art
Tag Art in itself is a challenge! I love how this one turned out with the hand sewn french knots!


Sunday, September 25, 2011

Thursday, September 22, 2011
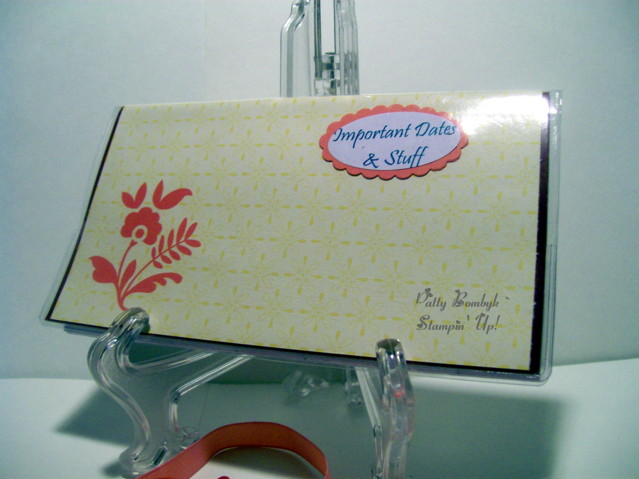
Domestic Goddess Suite
The Creative Crew challenge this month included using the Domestic Goddess suite. I altered a cup carrier from DQ to make the gift packaging, altered a pocket folder into a coupon holder, and altered a calendar book for important dates. The package will include a plant, some dish towels, and of course the necessary candy ;)


Monday, September 19, 2011
Pure Vanilla For Blue
The SCS administrator, Lydia > http://understandblue.blogspot.com
was the featured stampered lately, I love her clean and simple style, and she loves all white cards - I choose to make an all Vanilla card.

was the featured stampered lately, I love her clean and simple style, and she loves all white cards - I choose to make an all Vanilla card.

Friday, September 16, 2011


Wednesday, September 14, 2011
More Recycling!
Lookie! An Arizona Ice Tea can! Cut into panels, run it through the Big Shot, and make a card!


Monday, September 12, 2011
My Change Purse
I love to alter things, I need to use up some of my stash, my Altoid Tin fell apart after using it for change for about three years.... So I guess that's a recipe for a new one! Lookie, it originally had a small maglight packaged in it!


Saturday, September 10, 2011
Thinking Fall, Already?
Man has this week cooled off here in Michigan! Actually I haven't seen any Phesants lately, but they were all over this summer!


Friday, September 9, 2011
Read Any Good Books Lately?
I know the world is turning to Kindles & Nooks, but sometimes I just like the feel of a good old fashion book in my hands. And nothing is more fun than old fashioned bookmarks! This was a fun way to use up some of my retired hodgepodge hardware!


Wednesday, August 17, 2011
A little something
Geez can you believe August is half over? I'm preparing to send all three of my babies off to college or "CL5" for Kait. While on one hand I'm looking forward to getting back into a routine, on the other I'm not sure I'm ready for an almost completely empty nest, sigh....
My young neice DD went back to Texas and my neice Em has landed a job in Oregon. Our family is blowing to the four corners it seems, sigh....
Last week we found out that four of my co-workers will be off on medical leaves, 2 of them with cancer, 1 with a spinal cord surgery, and the other with an inflammatory disease that has left her unable to work, sigh....
And to add to it, in my infinite wisdom I decided to tear apart my entire craft corner to clean and re-organize. In looking back this wasn't such a good week for that, sigh....
However, on a bright note I did enjoy playing along with the dirty dozen in the annual Dare to get Dirty challenges over on SCS. Thankfully I had the foresight to make some "thinking of you" and generally cheerful cards because it's looking like I'll be needing them!
Here's a Center step card made with our Paisley Print DSP, I'm pretty pleased with this one!

Monday, July 25, 2011


Friday, July 22, 2011
This One's For My Girl
My Mingler pals will recognize the "rules" right off, but I had to literally laugh out loud when my Kaitlin came to me out of the blue one day and announced "Mom, Boys are DUMB!" Yep, sweetie they can be, however they're still an important part of our lives. While Jeff and I were camping a few weeks ago and I was waiting for him while he was in class I set out to make this for Katie. When I got home she and I finished it together and this is what she came up with.


Wednesday, July 20, 2011
SQUEEEEE! I have a tutorial published on SCS!
Paper Beads with DSP - Some of you may remember that I promised a tutorial several months ago for this fun project. It's taken a while because I couldn't share it until Beate had it posted on SCS, but here it is now! Be on the look out for my fancy fold tutorial as well!
Paper Beads are a fun way to use up scraps of DSP, and it’s not just for crafters, it’s a fun “mommy & me” project to do with the “littles” as well!
Supplies: Pretty Designer Paper, Toothpicks, Glue, Diamond Glaze, Bone Folder, Scissors/paper trimmer

NOTE: Diamond Glaze gives the paper beads a nice shiny/glassy look, however you could use Modge Podge, Shimmer Paint, or VersaMark and UTEE to finish the beads as well, anything that dries clearly could be used.
Step 1: Cut DSP into ½” x 4” strips

Step 2: “Curl” the DSP using your bone folder, this will help as you begin to wrap your beads.

Step 3: Put a thin strip of glue on one end of the DSP. You don’t need a lot of glue, but don’t skimp either, a thin line of glue on the last two inches should do.

Step 4: Beginning with the end with no glue, start wrapping the DSP tightly around the toothpick. The glue will ooze out as you get to that end, just wipe off excess glue. (Tip, you may want to keep wet wipe next to you to wipe any excess glue off your fingers)

Step 5: Place toothpick across a narrow container (SU Build a brad container used here) or poke the toothpick into a piece of Styrofoam if you have some.

Step 6: Continue rolling beads until you have the number you want.

Step 7: Place a quarter size dollop of Diamond Glaze (SU Crystal Effects used here) onto a disposal plastic “palette” (An old CD or plastic lid works great)

Step 8: Carefully roll the bead into the diamond glaze to coat, being careful not to get any onto your toothpick.
TIP: You can get really creative now, try wrapping metallic string/embroidery floss, sprinkling glitter, mini confetti, etc, on while the diamond glaze is still wet to give the beads some texture or added dimension.

Step 9: Once you have all your beads rolled allow them to dry (walk away, do the dishes, watch a movie, do not attempt to heat dry diamond glaze it just won’t dry looking right)

Step 10: After at least one hour come back and carefully slide your beads off your toothpicks.

Step 11: String your beads as you wish

Step 12: Use beads as a decorative element

Option 2, Step 1: Cut DSP into triangles 4” long by 1” across at the widest edge.

Option 2, Step 2: Roll as stated in steps 2 – 10 above starting with the one inch edge.

Option 2, Step 3: You’ll have long, tapered beads this way

Option 2, Step 4: String and use!

Subscribe to:
Posts (Atom)